
RV cooking
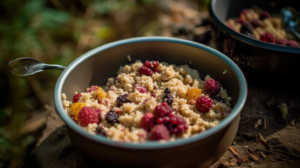
Breakfast Quinoa Recipe

Ingredients:
- 1 cup of quinoa
- 2 cups of milk (you can use any type of milk you prefer)
- 2 tablespoons of honey (or to taste)
- 1 cup of mixed berries (blueberries, raspberries, strawberries, etc.)
Instructions:
- Rinse the quinoa under cold water until the water runs clear.
- In a medium-sized saucepan, combine the rinsed quinoa and milk. Bring the mixture to a boil over medium heat.
- Once it’s boiling, reduce the heat to low, cover the saucepan, and let it simmer for about 15 minutes, or until the quinoa has absorbed all of the milk. Make sure to stir occasionally to prevent sticking.
- Once the quinoa is cooked and creamy, remove it from the heat. Stir in the honey until it’s well combined.
- Divide the quinoa between two bowls. Top each bowl with half of the mixed berries.
- Serve warm and enjoy!
This delicious and nutritious breakfast quinoa is perfect for starting your day right while on the road. It’s quick to make, packed with protein, and can be customized with your favorite fruits and sweeteners.
Sausage and Veggie Skewers Recipe


Ingredients:
- 2 medium-sized sausages
- 1 large bell pepper
- 1 medium-sized onion
- 1 small zucchini
- 2 tablespoons of BBQ sauce
Instructions:
- Start by preheating your grill or campfire. You want it hot enough to cook the sausages and veggies well.
- While your cooking surface is heating up, cut the sausages and veggies into bite-sized pieces.
- Next, thread the sausage pieces, bell pepper, onion, and zucchini onto two skewers. Alternate between the different ingredients to make it colorful and varied.
- Once all your ingredients are on the skewers, brush them with BBQ sauce. Be generous, but also ensure you’ve left some for basting as they cook.
- Now it’s time to cook your skewers. Place them on the grill or hold them over the campfire. Cook for around 10-15 minutes, turning regularly to make sure they cook evenly. Baste with more BBQ sauce each time you turn them.
- The skewers are done when the sausages are cooked through and the veggies are tender and slightly charred.
- Remove from the heat and let cool for a few minutes before serving. Enjoy your delicious, easy-to-make, campfire sausage and veggie skewers!
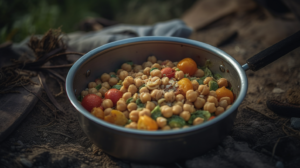
Chickpea Salad

 Ingredients:
- 1 can (15 ounces) of chickpeas
- 1 cucumber
- 1 cup of cherry tomatoes
- 1/2 cup of feta cheese
- 2 tablespoons of olive oil
- Juice of 1 lemon
Instructions:
- Start by draining and rinsing the chickpeas under cold water.
- Peel the cucumber and chop it into bite-sized pieces.
- Halve the cherry tomatoes.
- In a large bowl, combine the chickpeas, chopped cucumber, halved cherry tomatoes, and crumbled feta cheese.
- In a small bowl, whisk together the olive oil and lemon juice to make a dressing.
- Pour the dressing over the salad and toss gently to combine. Serve immediately or store in a cool place until you’re ready to eat.

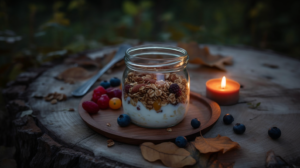
Granola and Yogurt Parfait

 Ingredients:
- 2 cups of your favorite granola
- 2 cups Greek yogurt
- 1 cup fresh berries (strawberries, blueberries, raspberries, etc.)
Instructions:
- Grab two cups or glasses. Layer 1/4 cup of granola at the bottom of each cup.
- Add 1/4 cup of Greek yogurt on top of the granola in each cup.
- Layer 1/8 cup of fresh berries on top of the yogurt.
- Repeat these layers until the cups are filled, finishing with a layer of berries on top.
- Serve immediately, or refrigerate for up to 2 hours before serving.
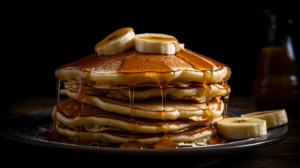
Banana Pancakes

Ingredients:
- 2 ripe bananas
- 4 large eggs
- 2 tablespoons all-purpose flour
Instructions:
- In a bowl, start by peeling and mashing the two ripe bananas until no large chunks remain.
- Crack four large eggs into the bowl and whisk them together with the mashed bananas until well combined.
- Stir in two tablespoons of all-purpose flour to the banana and egg mixture. This step is optional, but it helps create a more traditional pancake texture. If you prefer, you can leave the flour out for gluten-free pancakes.
- Heat a non-stick skillet or griddle over medium heat. Once hot, drop 1/4 cup of the pancake batter onto the griddle for each pancake.
- Cook until the edges look set and bubbles form on the surface, about 2-3 minutes. Flip the pancakes and cook for another 2-3 minutes on the other side, until golden brown and cooked through.
- Repeat the process with the remaining batter.
- Serve the banana pancakes warm. You can add optional toppings like a drizzle of maple syrup, a dusting of powdered sugar, or a sprinkle of chopped nuts. Enjoy this healthy and satisfying campfire breakfast!
Overnight Oats

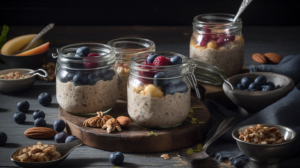
This is a no-cook, prepare-ahead recipe that’s perfect for early mornings. Just mix the oats, milk, Greek yogurt, and honey in a jar, top with your favorite fruits and nuts, and let it sit in the fridge overnight.
Ingredients:
- 2 cups rolled oats
- 2 cups milk (or almond milk for a dairy-free alternative)
- 1 cup Greek yogurt
- 2 tablespoons honey
- 2 servings of your choice of fruit (for example, 2 sliced bananas or 1 cup of mixed berries)
- A handful of nuts (optional, for added crunch and nutrition)
Instructions:
- In a jar or container, combine the rolled oats, milk, and Greek yogurt.
- Add the honey and stir to combine.
- Top with your choice of fruit and nuts.
- Let sit in the fridge overnight and enjoy in the morning.
The beauty of this recipe is that it is highly customizable. You can use any type of milk, yogurt, sweetener, fruit, and nuts you like, making it a versatile recipe that never gets old.
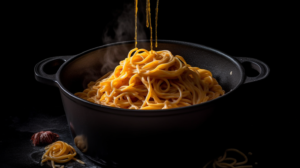
One-Pot Pasta

Ingredients:
- 6 ounces of pasta (your choice, could be spaghetti, penne, etc.)
- 1.5 cups of tomato sauce
- 1 clove of garlic, minced
- 2 tablespoons of olive oil
- 1 teaspoon of Italian seasoning (or a mix of oregano, basil, and thyme)
- Salt and pepper to taste
- 2 cups of water
Instructions:
- In a medium-sized pot, heat the olive oil over medium heat. Add the minced garlic and sauté until fragrant. Be careful not to burn the garlic.
- Add the pasta, tomato sauce, and the water to the pot. Season with Italian seasoning, salt, and pepper. Stir to combine.
- Raise the heat to high and bring the mixture to a boil.
- Once boiling, reduce the heat to low and let it simmer. Stir occasionally to prevent the pasta from sticking to the bottom of the pot.
- Let the pasta cook for about 10-15 minutes, or until the pasta is cooked to your liking and most of the liquid has been absorbed.
- Adjust seasoning if necessary, then serve hot. Enjoy your one-pot pasta!
This meal is perfect for a quick and easy dinner while on the road. Feel free to add any additional ingredients you have on hand, such as vegetables or protein.
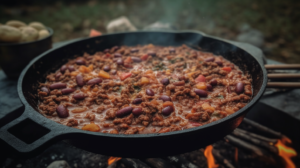
Campfire Chili Recipe

Ingredients:
- 1/2 pound ground meat (beef, turkey, or plant-based)
- 1 can (about 15 oz) beans of your choice, drained and rinsed
- 1 can (about 15 oz) diced tomatoes
- 1 tablespoon chili powder
- 1 teaspoon cumin
- 1/2 large onion, diced
- 2 cloves garlic, minced
- Salt and pepper to taste
Instructions:
- First, you’ll need to heat a pot over your campfire or on your portable stove. Once heated, add in your ground meat. Cook until browned, stirring occasionally to ensure it cooks evenly. If you’re using plant-based meat, follow the package instructions for cooking.
- While your meat is cooking, dice your onion and mince your garlic. Once your meat is browned, add these to the pot and stir. Cook until the onions become translucent, typically about 5 minutes.
- Next, add in your beans and diced tomatoes (including the liquid from the tomatoes for added flavor), followed by your chili powder and cumin. Stir everything together until it’s well combined.
- Let your chili simmer for about 15 minutes, or until it’s heated through. Stir occasionally to prevent any sticking to the bottom of the pot.
- Finally, taste your chili and add salt and pepper as needed. Once it’s seasoned to your liking, it’s ready to serve. Enjoy your campfire chili as a comforting, hearty meal after a day of adventure.
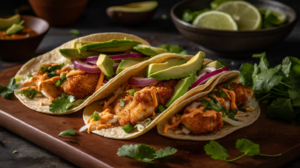
Fish Tacos Recipe

Ingredients:
- 2 medium-sized fish fillets (like tilapia, cod, or mahi-mahi)
- 1/2 cup of pre-made coleslaw mix
- 4 small flour tortillas
- 1/2 cup of tartar sauce (or to taste)
- 1 tablespoon of oil (for grilling the fish)
- Salt and pepper to season the fish
Instructions:
- Season the fish fillets with salt and pepper.
- Heat oil on a grill or campfire-safe pan. Once heated, add the seasoned fish fillets.
- Cook the fish on each side for about 4-5 minutes or until it’s opaque and can easily be flaked with a fork.
- Remove the fish from the grill or pan and let it rest for a few minutes. Once rested, use a fork to flake the fish into pieces.
- Warm the tortillas on the grill or in the pan. Be sure to flip them once or twice to avoid burning.
- Spread each tortilla with a generous amount of tartar sauce.
- Distribute the flaked fish evenly onto the tortillas.
- Top each taco with the coleslaw mix.
- Fold the tortillas in half, and they’re ready to be enjoyed.
Note: You can also add some fresh cilantro, avocado slices, a squeeze of lime, or hot sauce to these tacos for extra flavor. Customize them to your liking!
Homemade Trail Mix


Ingredients:
- 1 cup of mixed nuts (choose your favorite – almonds, walnuts, cashews, etc.)
- 1/2 cup of dried fruit (for example, raisins, cranberries, or chopped dried apricots)
- 1/4 cup of seeds (sunflower or pumpkin seeds are a great choice)
- 1/2 cup of M&Ms or other chocolate pieces (optional, but adds a sweet touch!)
Instructions:
- In a large bowl, combine the mixed nuts, dried fruit, seeds, and M&Ms or chocolate pieces, if using.
- Mix everything together until well combined.
- Divide the mix into two separate containers or reusable bags. The trail mix is now ready to be enjoyed as a snack during your camping adventures. It’s perfect for munching on during a hike, or as a quick energy boost anytime throughout the day.
- Store any leftovers in an airtight container to keep it fresh.
Enjoy your homemade trail mix while exploring the great outdoors!